EVM Asset -> Projected EVM (Hedera)
Overview
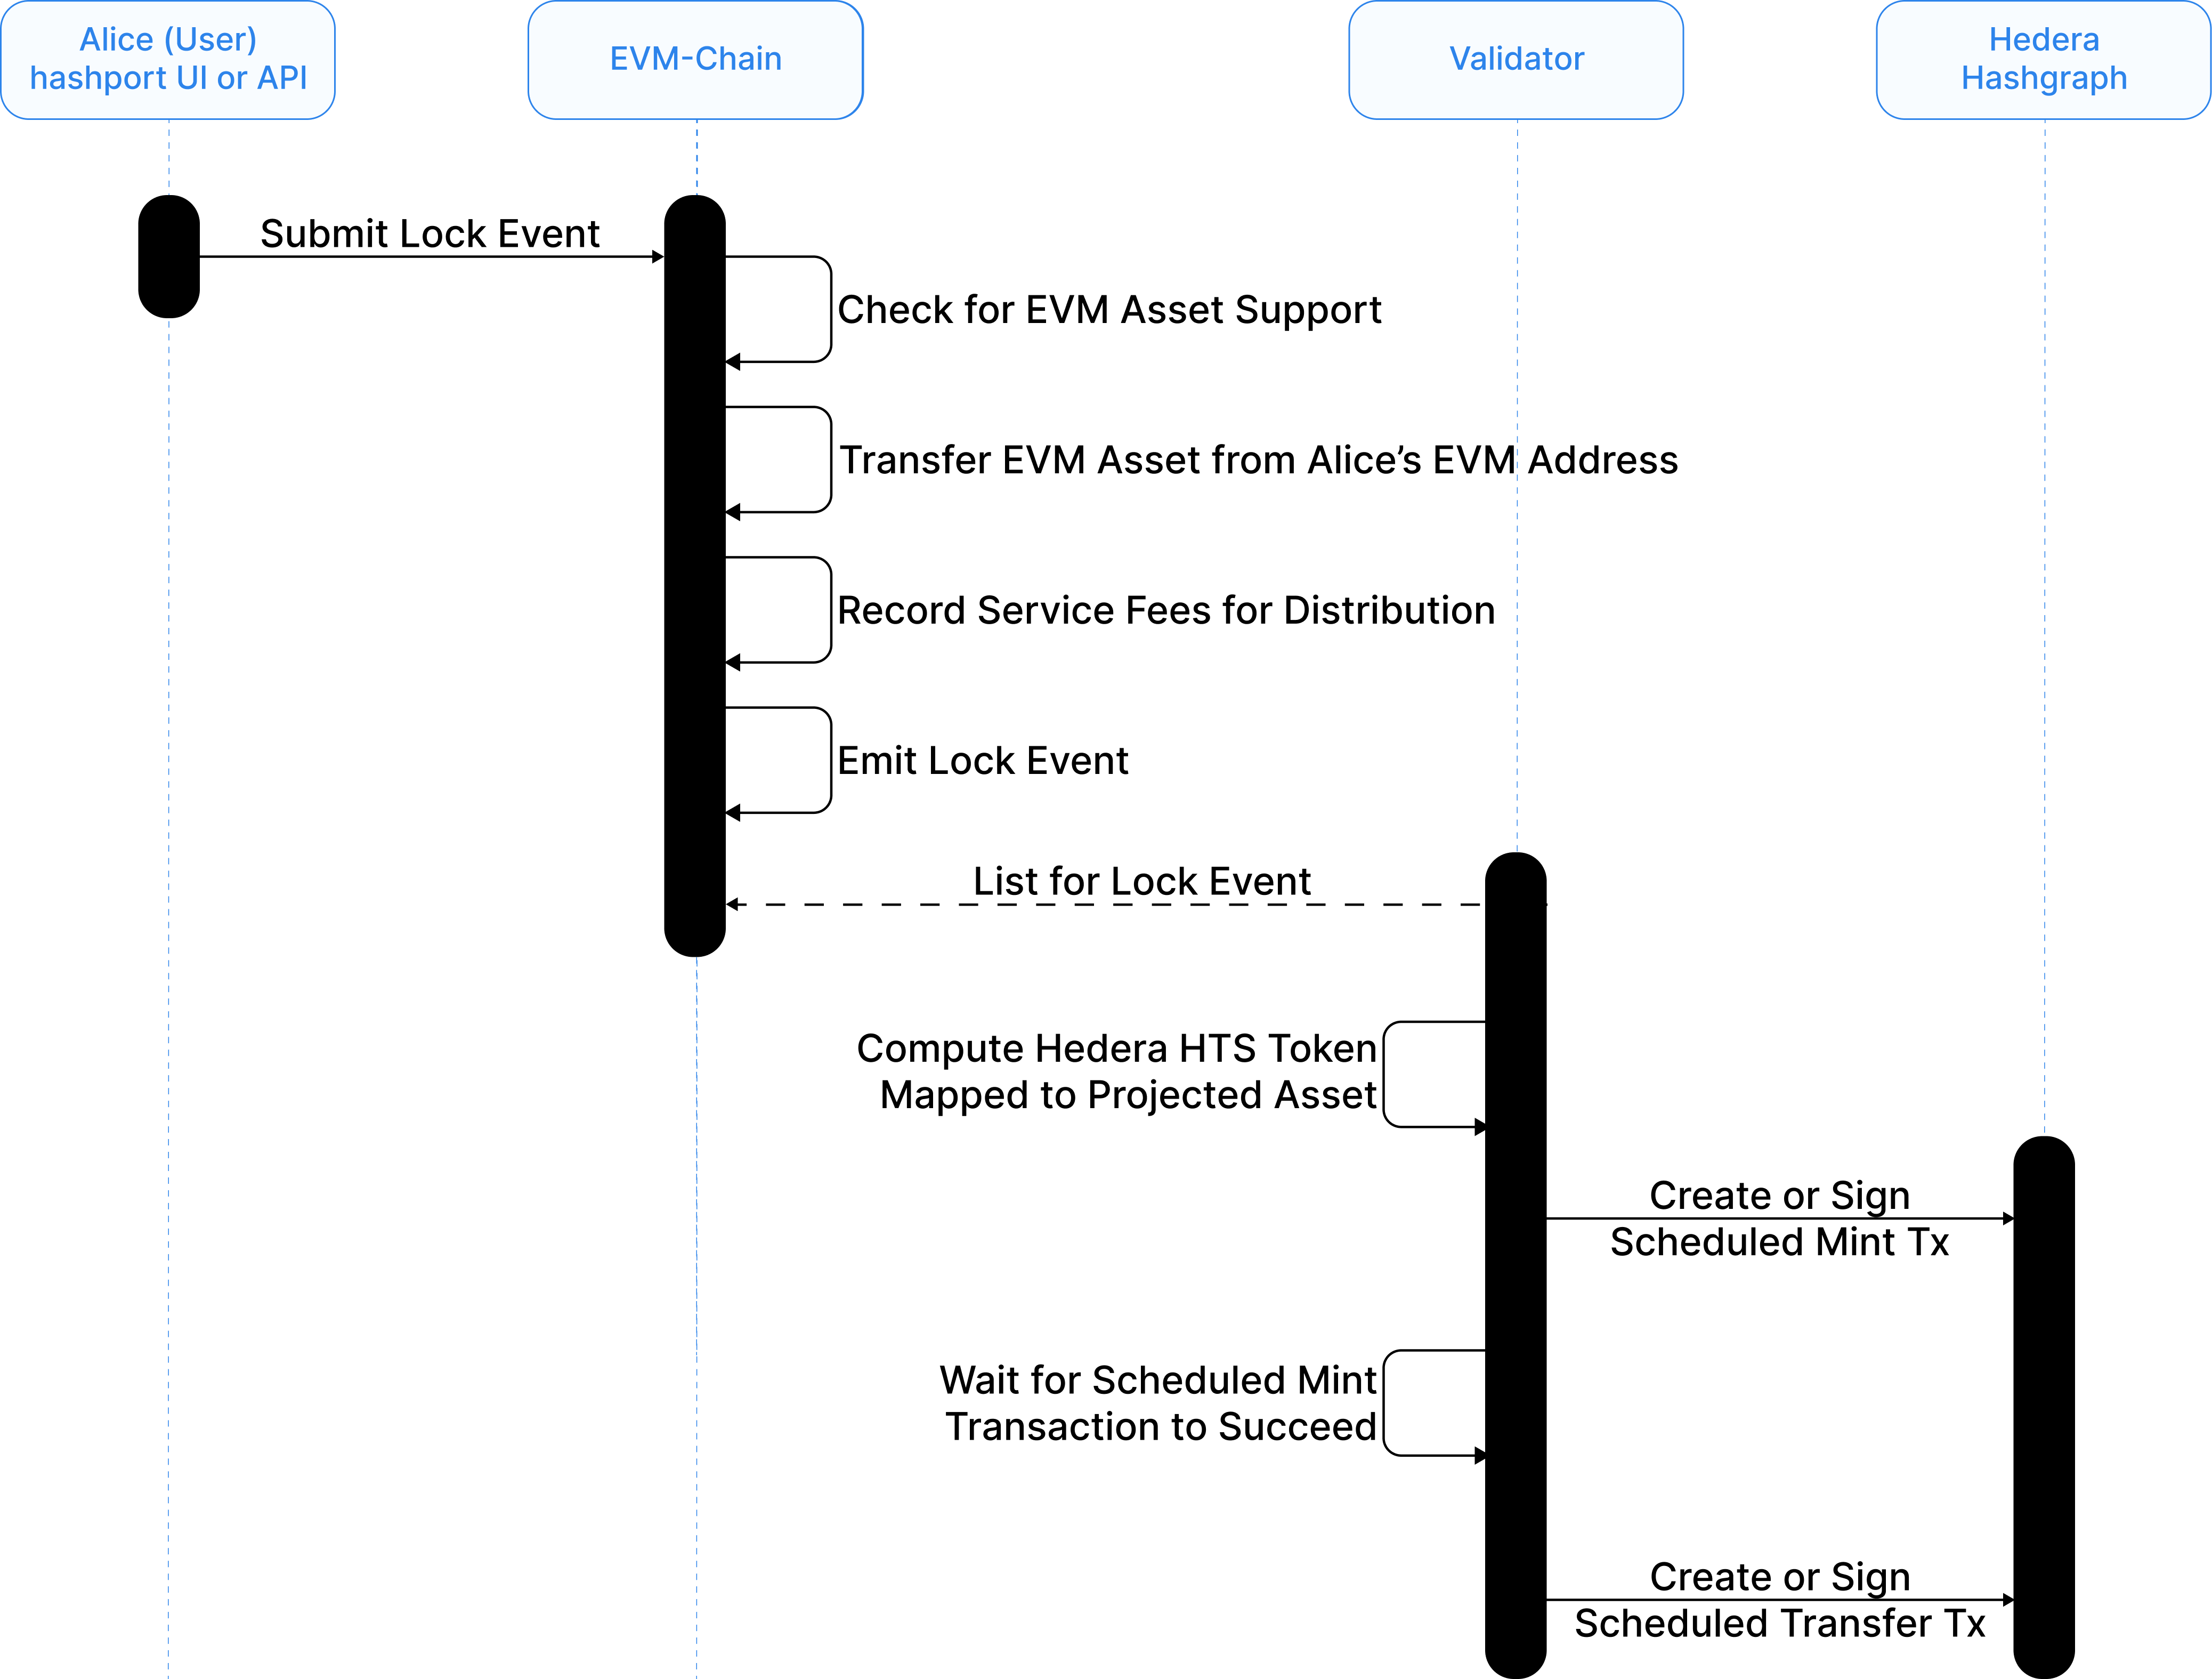
The transfer of ERC20 Tokens from an EVM chain to Hedera is described by the following sequence diagram.
Steps
1. Initiating the transaction
Alice uses the hashport client (a UI interface) to transfer the native EVM assets she wants to port. She uses a software crypto wallet (e.g. MetaMask) to sign and send a lock transaction to the Router contract. The transaction will specify:
amount, which is the amount of the native EVM assets she wants to port,accountId, the Hedera Account ID that will receive the Hedera tokens.
2. Locking operation
The smart contract verifies that the specified token is supported, transfers the Token from Alice's account, charges a service fee, and distributes the fee to all validator nodes in hashport. It will also emit a locking event with all the required metadata.
3. Picking up the event
3.1 Each validator will create a ScheduledMint transaction.
3.1 In addition, each validator node creates a Schedule Transaction (ScheduleCreate) that transfers the service fee amount from the Fee Account to the list of validators equally and the assets that Alice will receive.
3.2 Only one of these schedule transactions will be successfully submitted, creating a schedule entity. All other scheduled transactions will fail with IDENTICAL_SCHEDULE_ALREADY_CREATED error, and the transaction receipt will include the ScheduleID of the successfully submitted transaction.
3.3 All validators, except for the one that successfully submitted the transaction, will need to submit a ScheduleSign transaction.
You can learn more about Scheduled Transactions here.
4. Minting the Tokens
Once n out of m validators have signed the scheduled transaction, the specified amount of EVM tokens will be minted in the Treasury Account on the Hedera network.
5. Transferring the Tokens
Validators will create a ScheduleTransfer transaction that transfers the newly minted tokens from the Treasury Account to Alice's specified Hedera Account ID.